Activate and Lengthen
Part 1 was about the pattern: too much work in front, too little clear work behind, and the lower back stepping in. Now we make it practical. The goal is simple: get the glutes working again, lengthen the front of the hip actively, and build control before load comes in. Not a random routine, but the exercises I come back to again and again in practice.
Before we start, one thing about the way I work. I don't just want you to copy a movement — I want you to understand what it's supposed to change. First you notice the pattern: maybe the glute doesn't really switch on, maybe the lower back takes over. Then you understand why. Then we choose the exercise. And then we check whether anything actually changed. That last part matters: if you understand the point of an exercise, you're much more likely to feel when it's right — and when it's just a shape you're making.
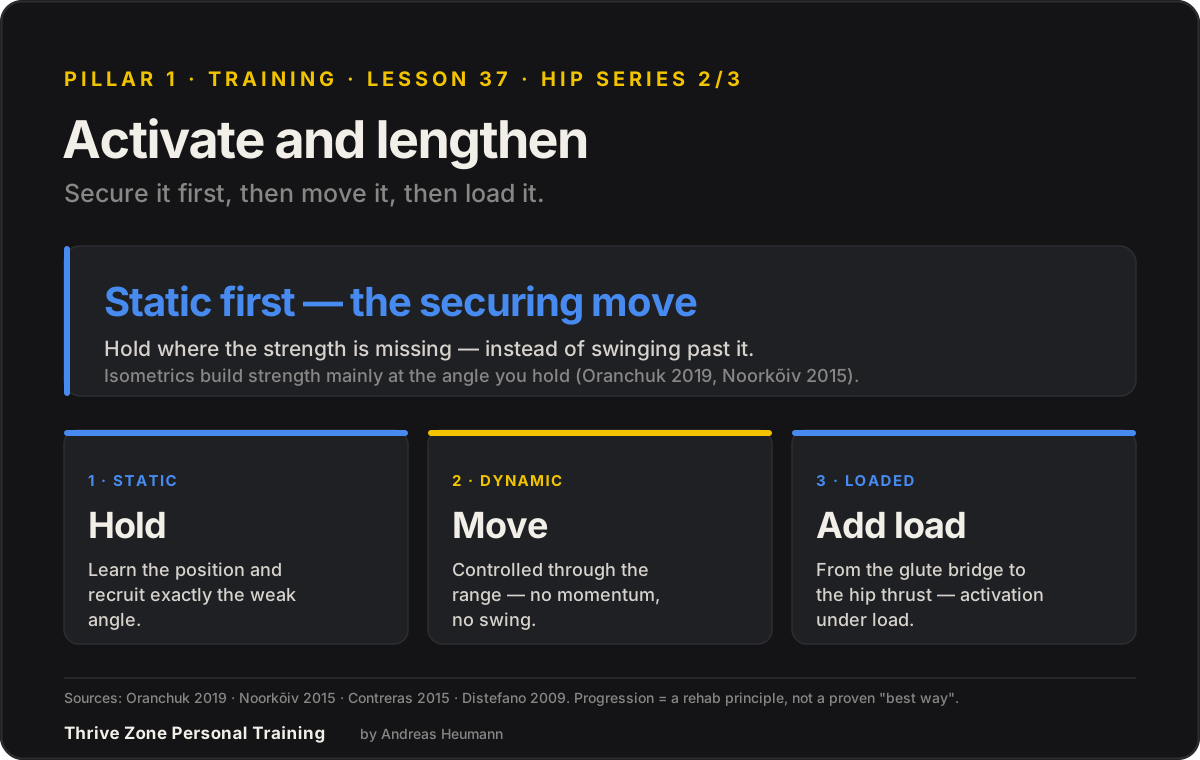
Static first. Every activation exercise starts with a quiet hold before speed and load come in. Two reasons: first, you learn the position without rushing through it — and second, you load exactly the point where control is missing, instead of swinging past it. So the order is simple: hold first, then move, then load.
Isometric (static) training builds strength mainly at the joint angle you hold — and training in a stretched, long-muscle position carries the gain more broadly across the range. That's the reason to hold deliberately where things are weak.
Oranchuk DJ, et al. (2019). Isometric training and long-term adaptations: effects of muscle length, intensity, and intent. Scand J Med Sci Sports 29(4):484–503. DOI: 10.1111/sms.13375 · Systematic review. · Noorkõiv M, et al. (2015). Effects of isometric quadriceps strength training at different muscle lengths on dynamic torque production. J Sports Sci 33(18):1952–1961. DOI: 10.1080/02640414.2015.1020843 · Randomised study.
The sequence static → dynamic → loaded is a well-established progression principle from rehab — not a hard rule, but a reliable way to build control before load comes in. That's exactly how we work here.
For context: these are the exercises that have proved most reliable in my daily practice — they've helped everyone I've used them with. Not the only good exercises; just the ones I keep coming back to, because they teach the pattern clearly and transfer well. I'll keep adding building blocks through the newsletter and social.
Block A — Activation while standing
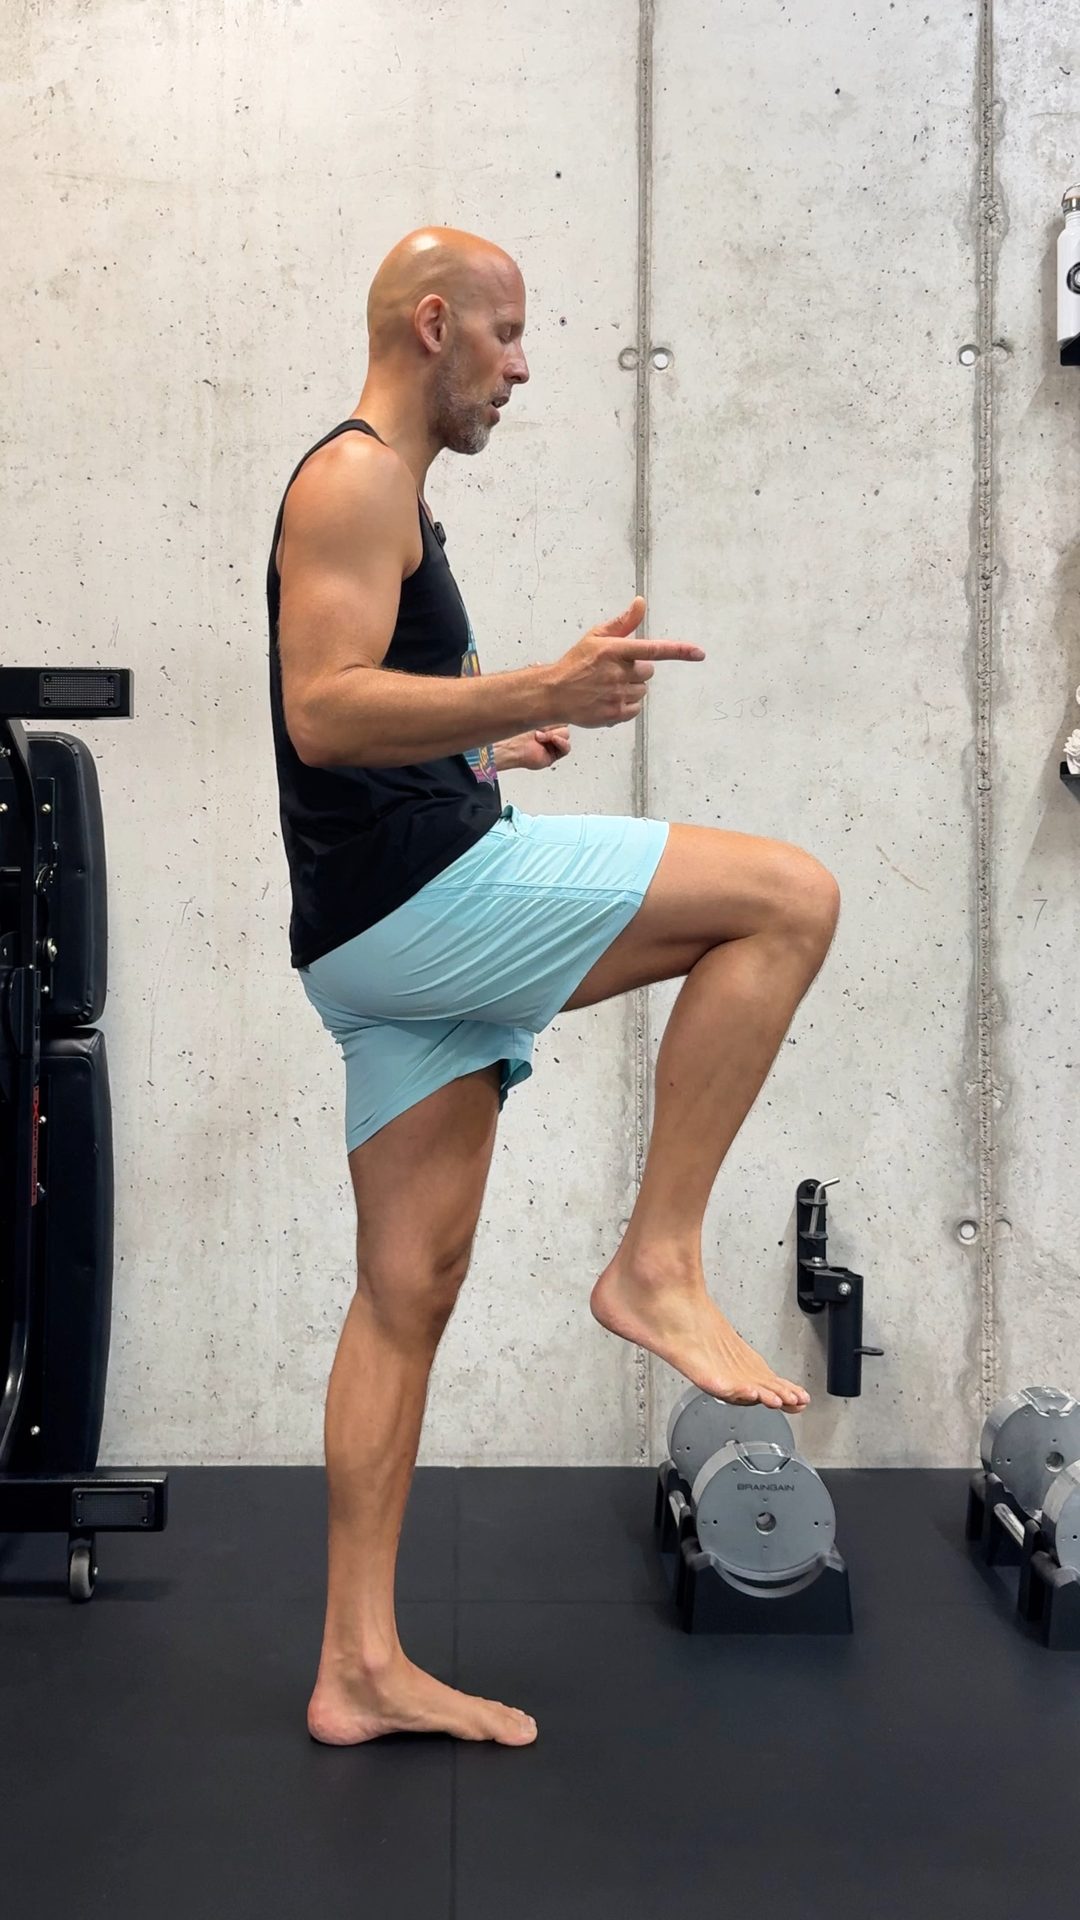
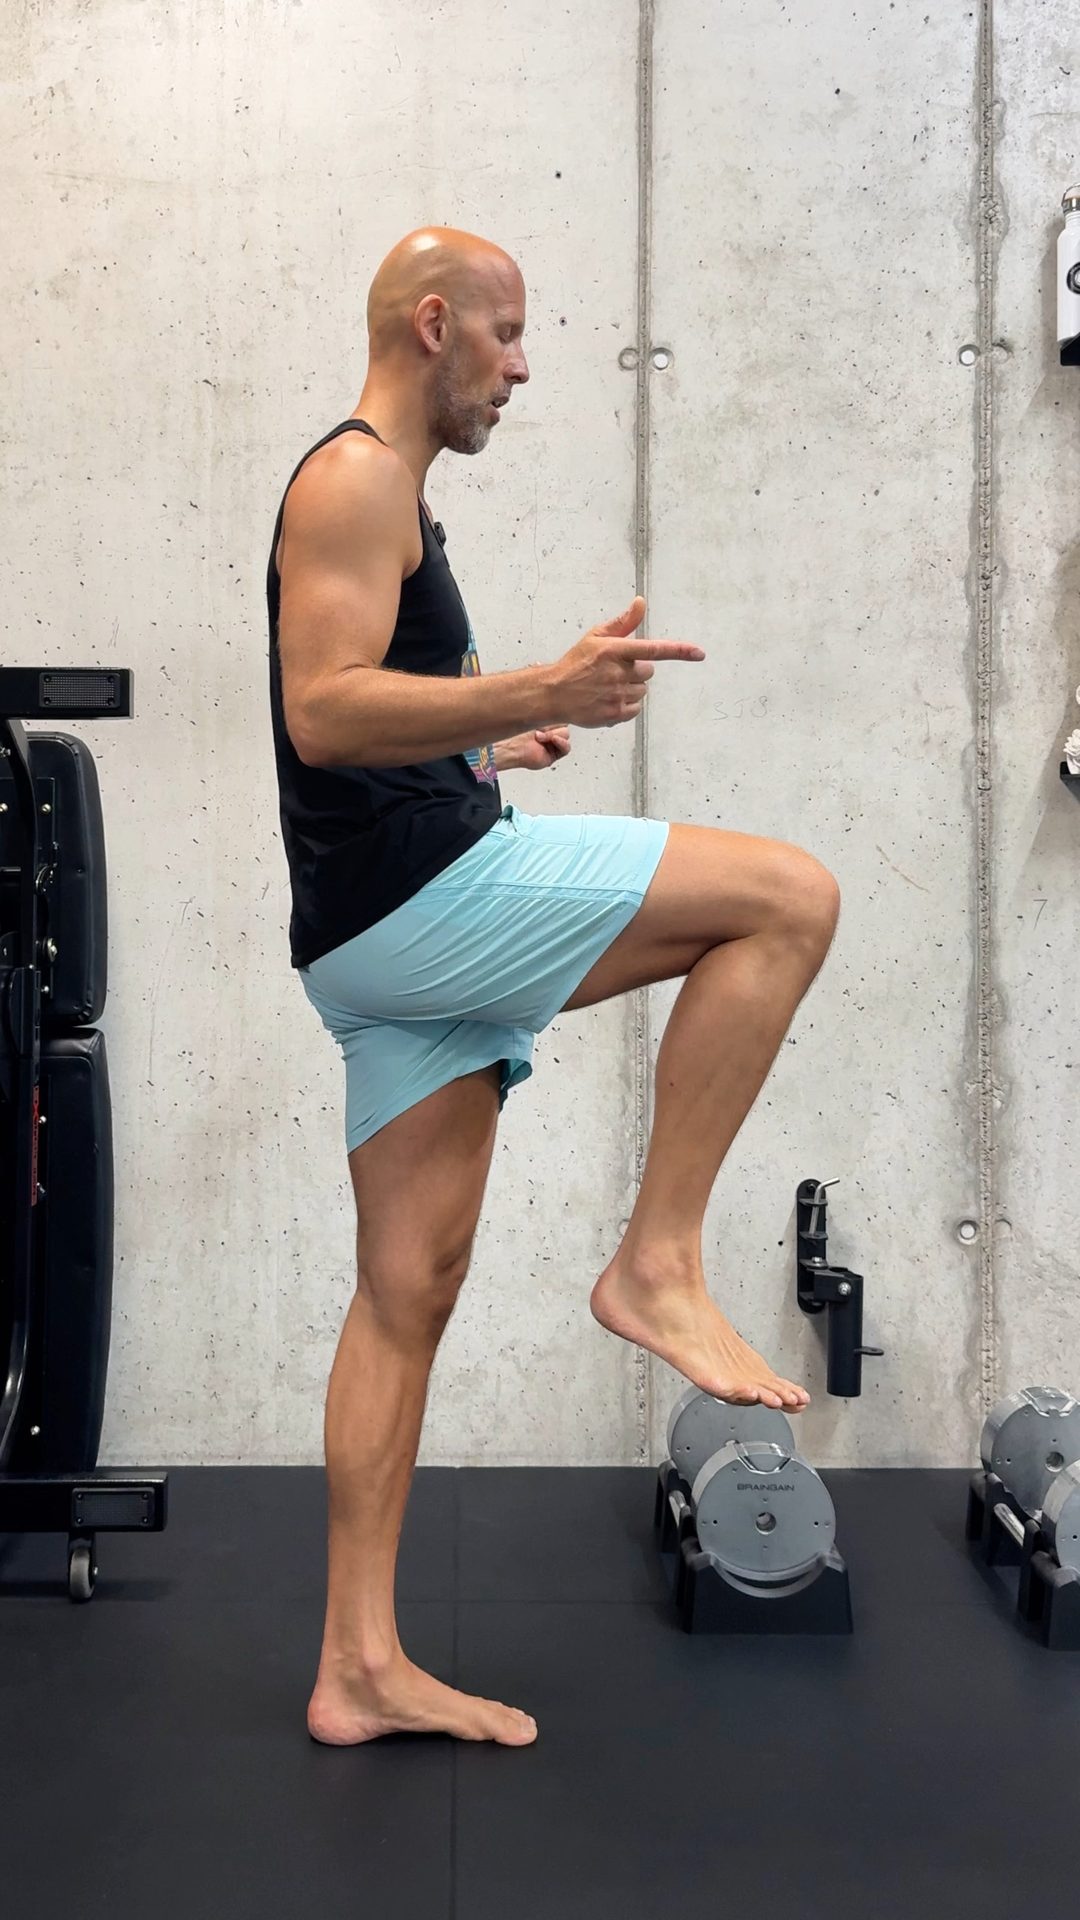
Single-leg stand with a "short foot"
Block A · anywhereStand on one leg, make the arch of the foot gently active, lift the other knee, and deliberately squeeze the glute on the standing side. Why: every step is a brief moment on one leg — so this trains the exact thing daily life keeps asking for: glute activation, foot control, and a pelvis that doesn't drop away.
Cue: pelvis level, glute firm, breath calm. Short and clean beats long and wobbly.
Block B — Recruiting the glutes: from static to hip thrust
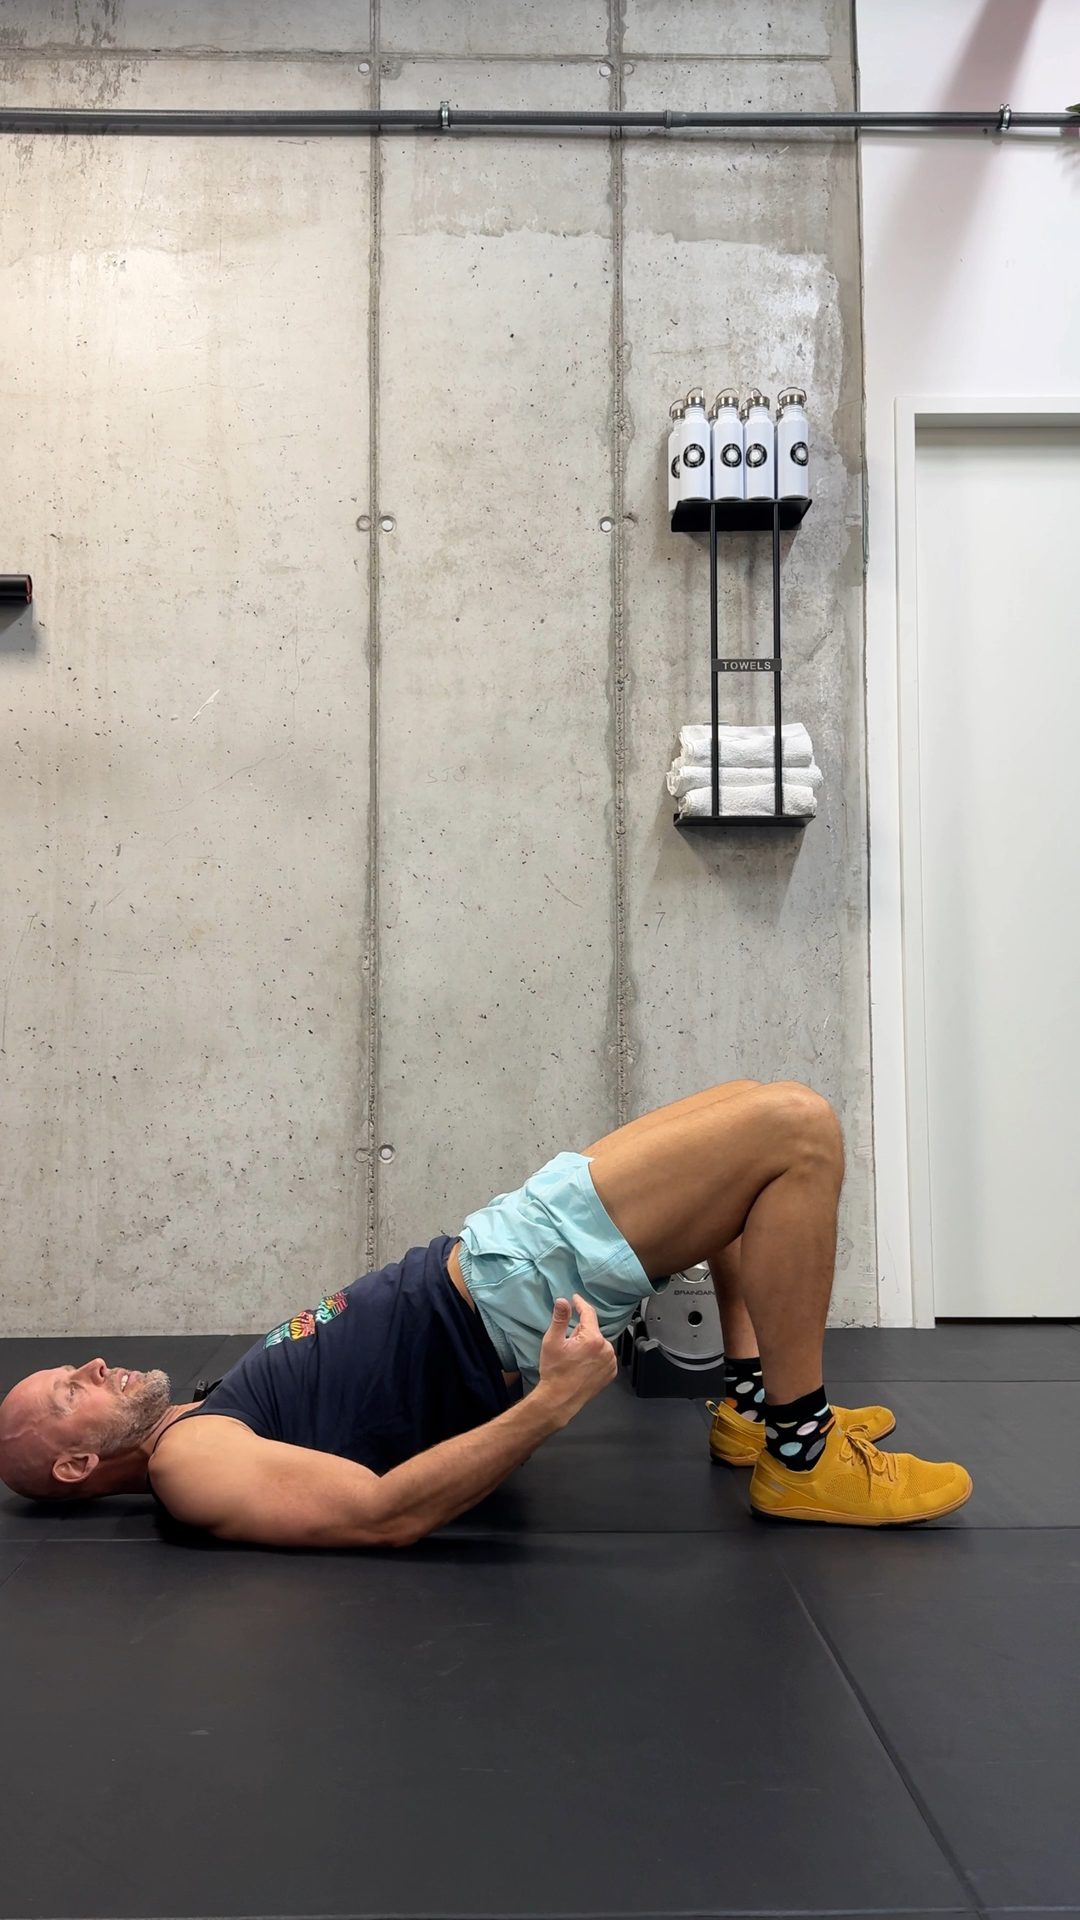
Glute bridge — hold it static first
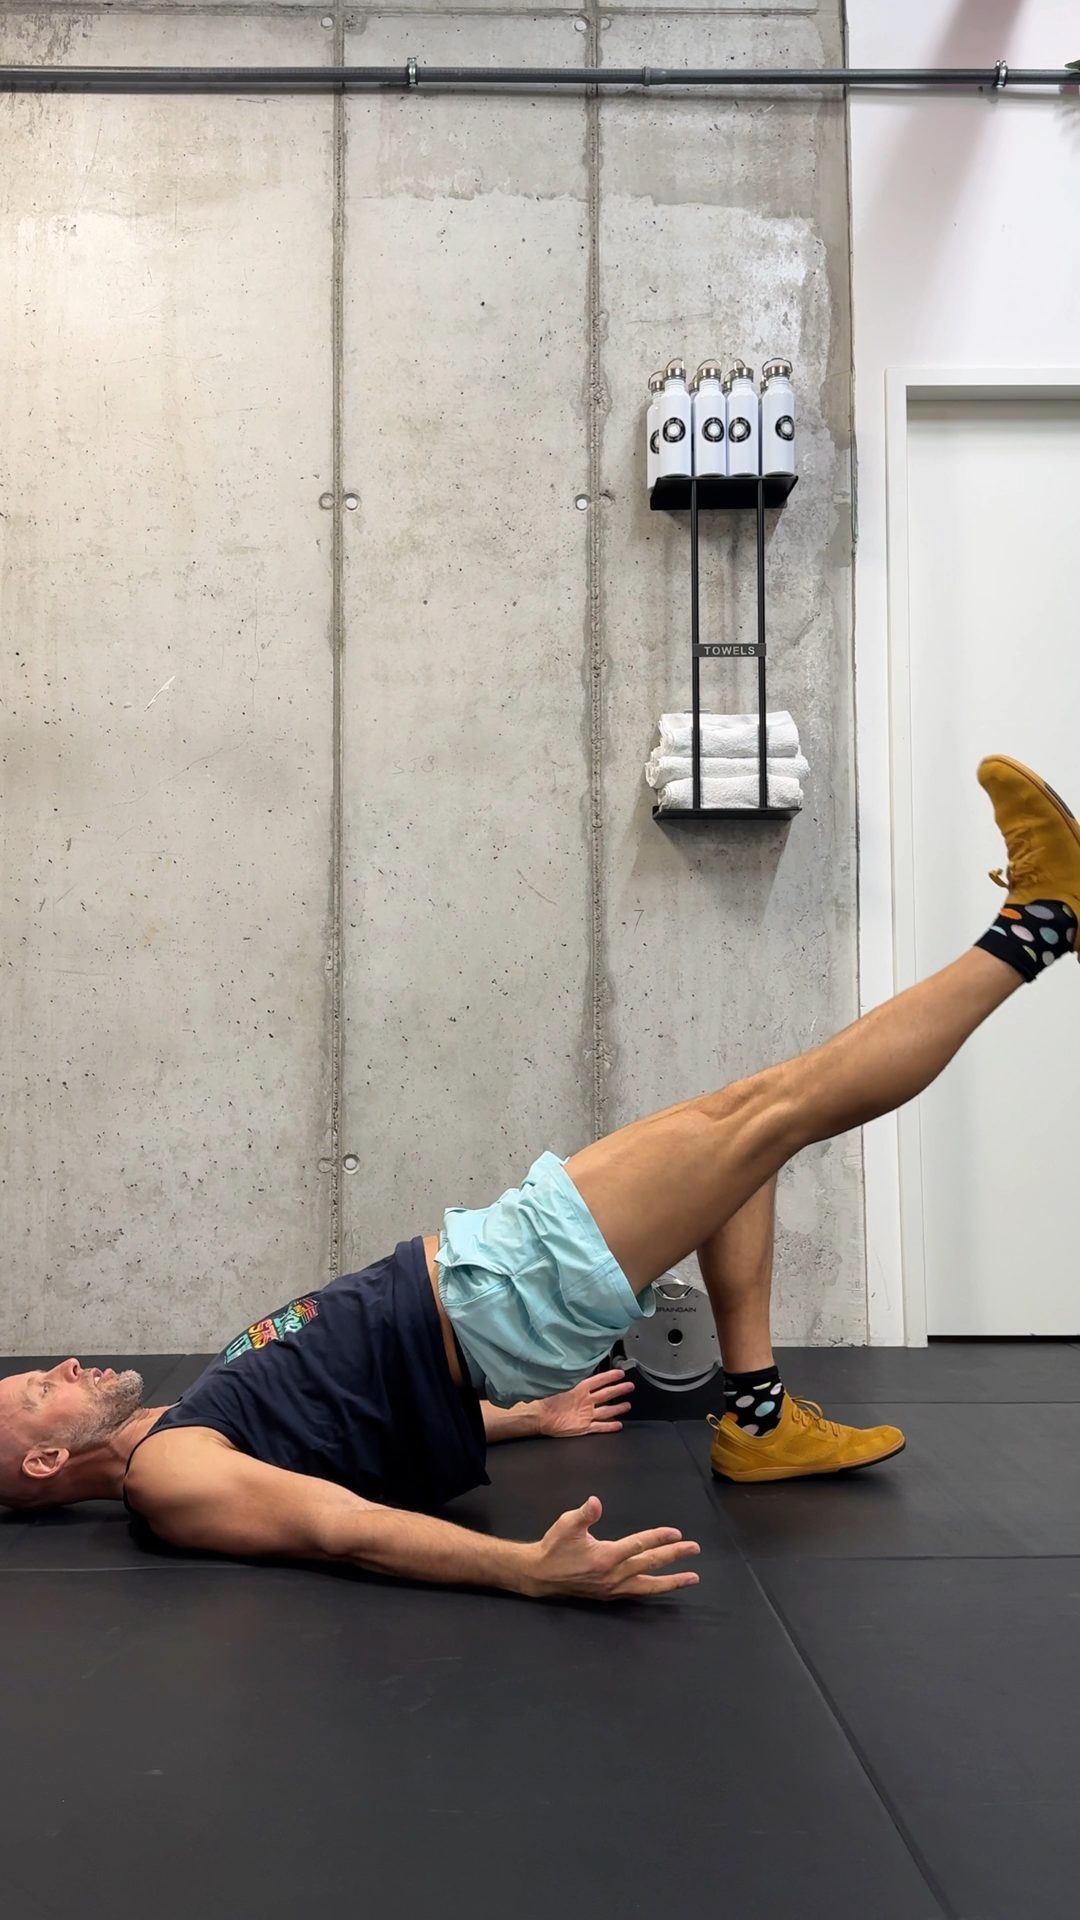
Block B · static → dynamic → single legLie on your back, feet planted, lift the hips and hold the top position (start with a few holds of 10–20 seconds). Only once that feels clear: raise and lower slowly, and later progress to single-leg versions or a marching bridge. Why: it's the simplest way into hip extension against gravity before real load comes in. The hold teaches the glute to do the work instead of letting the lower back take over.
Cue: at the top, tuck the pelvis slightly, squeeze the glutes hard, and keep the ribs quiet. The movement comes from the hips, not from arching the back.
Hip thrust with a top-hold
Block B · my strongest leverFor me, this was the biggest lever. Shoulders on a bench, feet planted, drive the hips up and hold the top. Start double-leg; add load only when the top position is clear and both sides feel even. Tempo: 2 seconds up, 2 seconds hold, 2 seconds down. Why: the hip thrust turns glute activation into real strength. The top-hold keeps the movement strict — without it, many people just move weight and still miss the glute.
Cue: tuck the pelvis slightly at the top, squeeze hard, keep both sides working evenly. Load matters later; the position matters first.
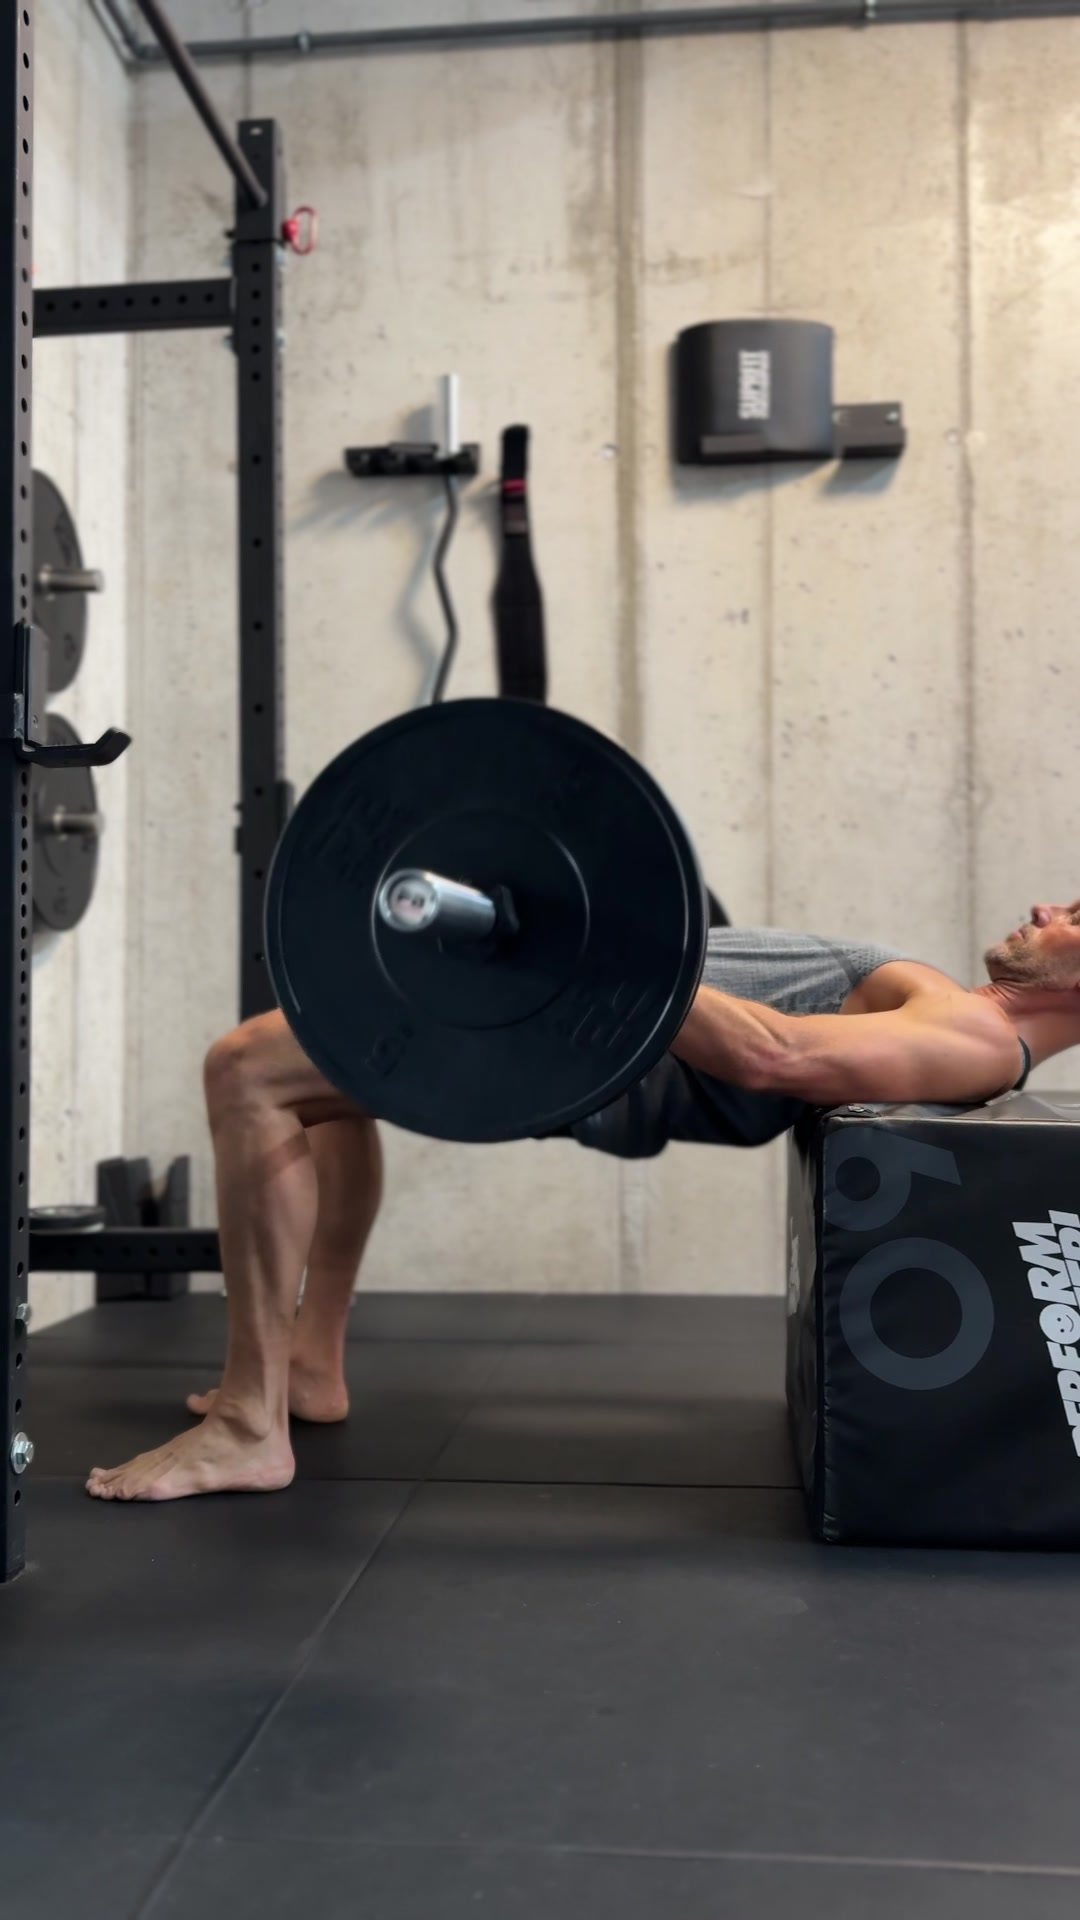
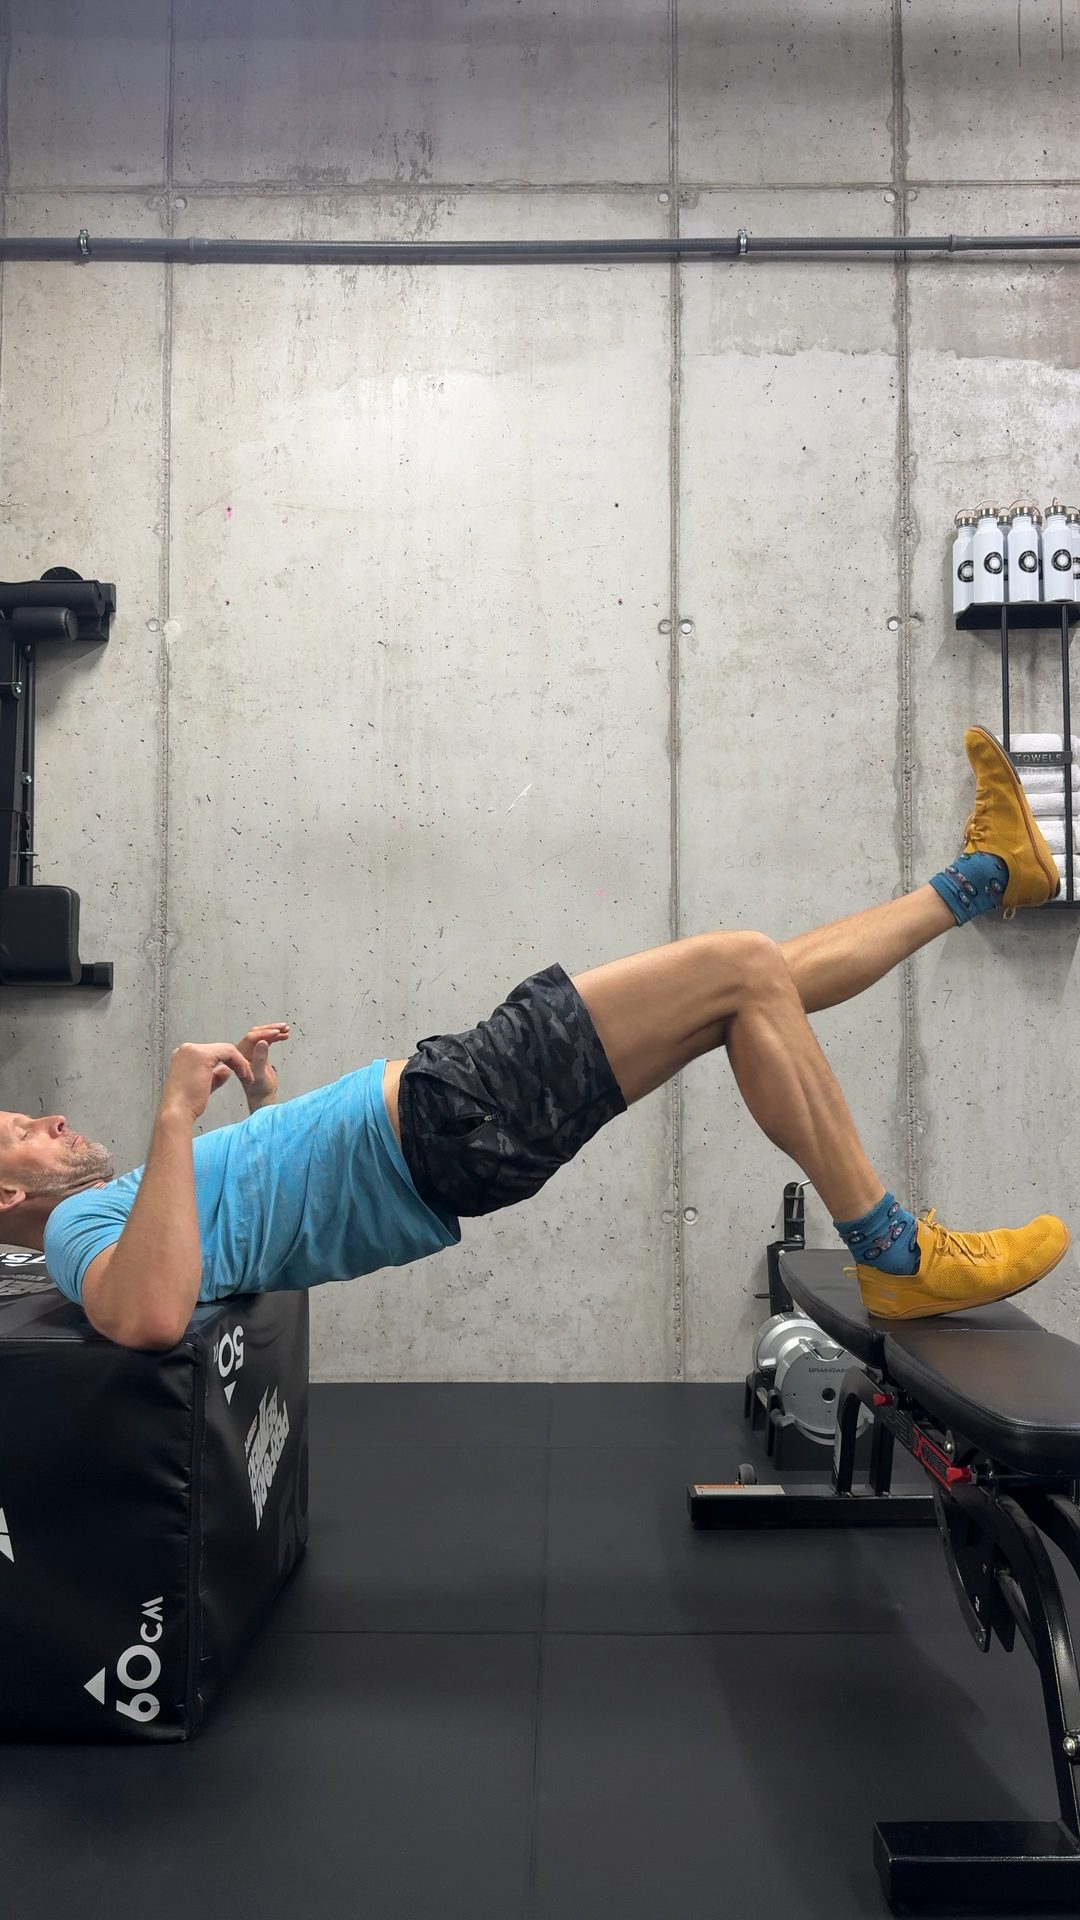
Compared with the back squat, the hip thrust produces much higher gluteus maximus activation (measured by EMG). Worth noting: high EMG activation is a useful pointer for exercise selection, but not proof of more muscle growth — over weeks, hip thrusts and squats build similar glute size.
Contreras B, et al. (2015). A comparison of gluteus maximus, biceps femoris, and vastus lateralis EMG activity in the back squat and barbell hip thrust. J Appl Biomech 31(6):452–458. DOI: 10.1123/jab.2014-0301 · EMG study.
Clamshell → side-plank clamshell
Block B · gluteus mediusSlow is the point. Lie on your side, pelvis still, knees bent. Open the top knee without rolling the pelvis back. First learn the movement, then hold the side-plank position, then combine side plank and clamshell — and add a band only once the shape stays clean. Why: this targets the gluteus medius — the side stabilizer that keeps the pelvis level on one leg. It's often the under-active one in the pattern from Part 1.
Cue: go fast and you can cheat the whole exercise. Keep the pelvis still and make the movement small enough that you actually feel the side of the hip.
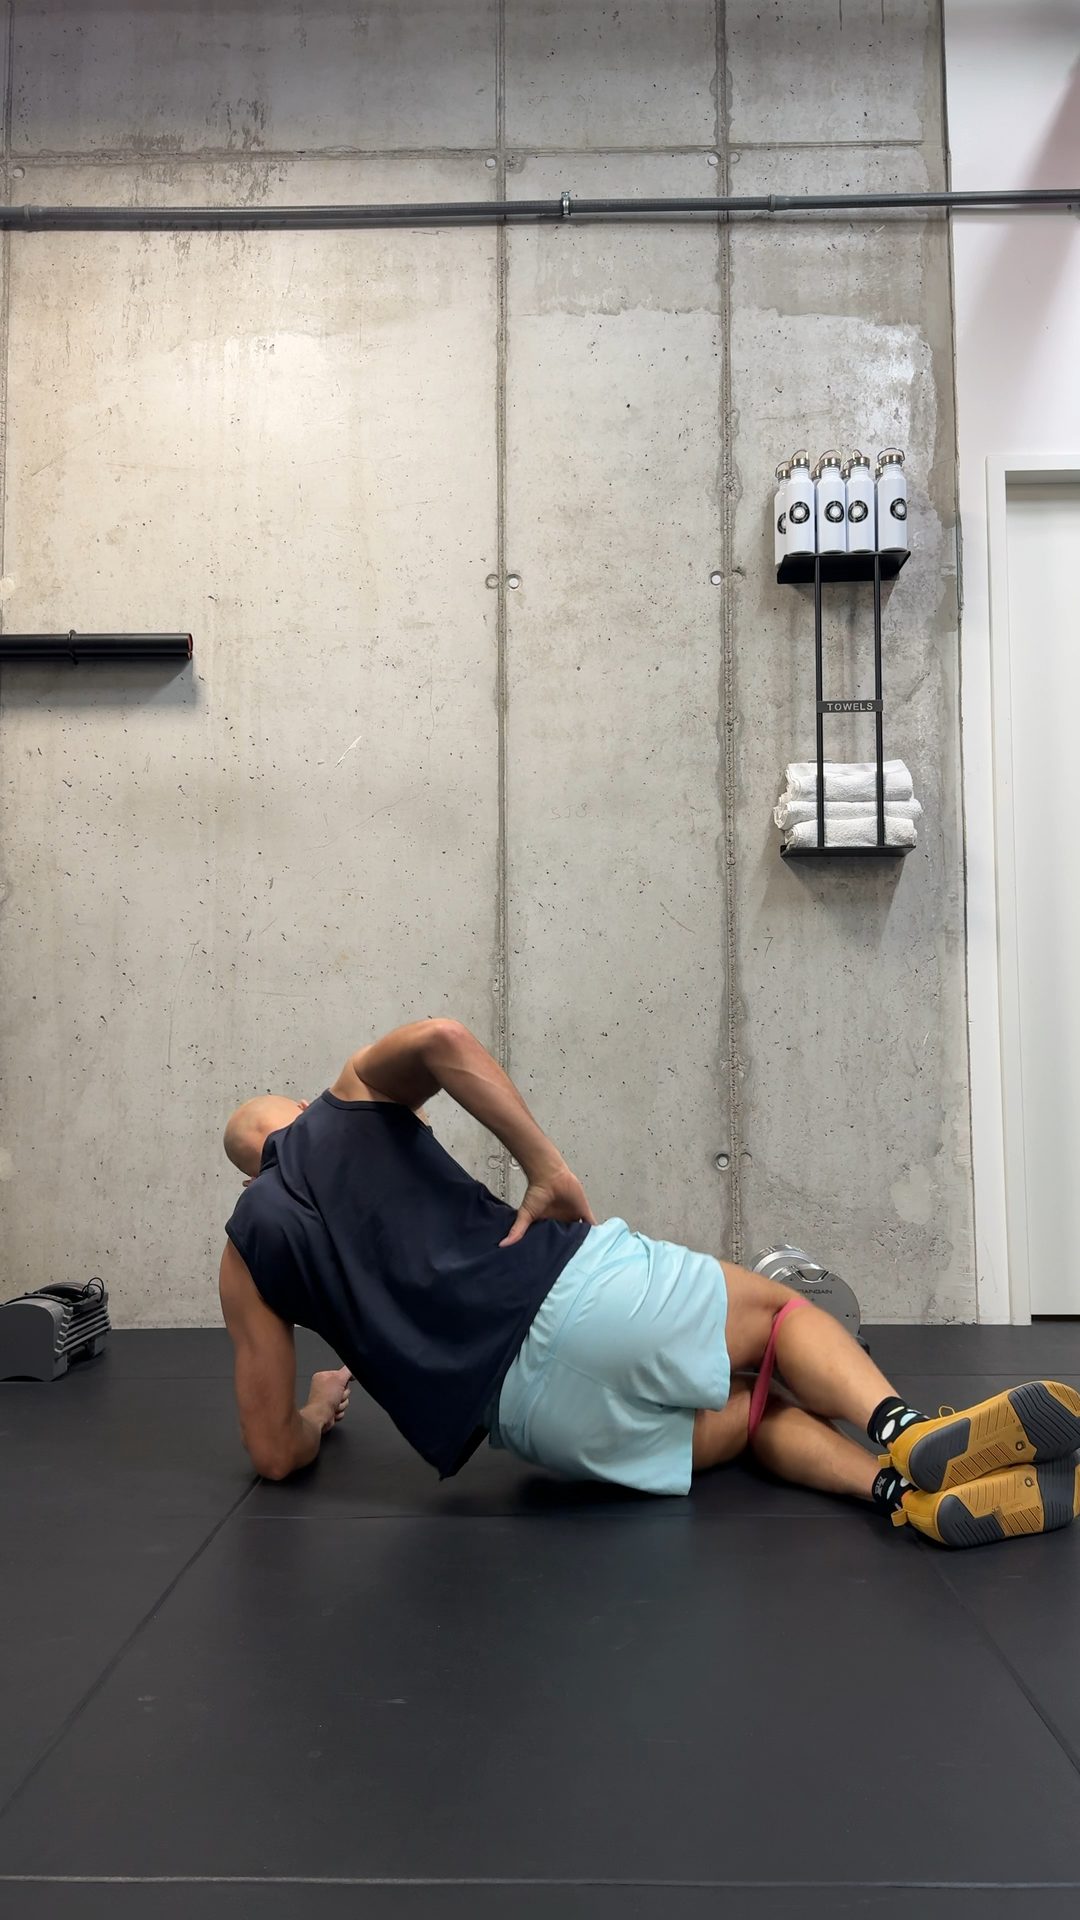
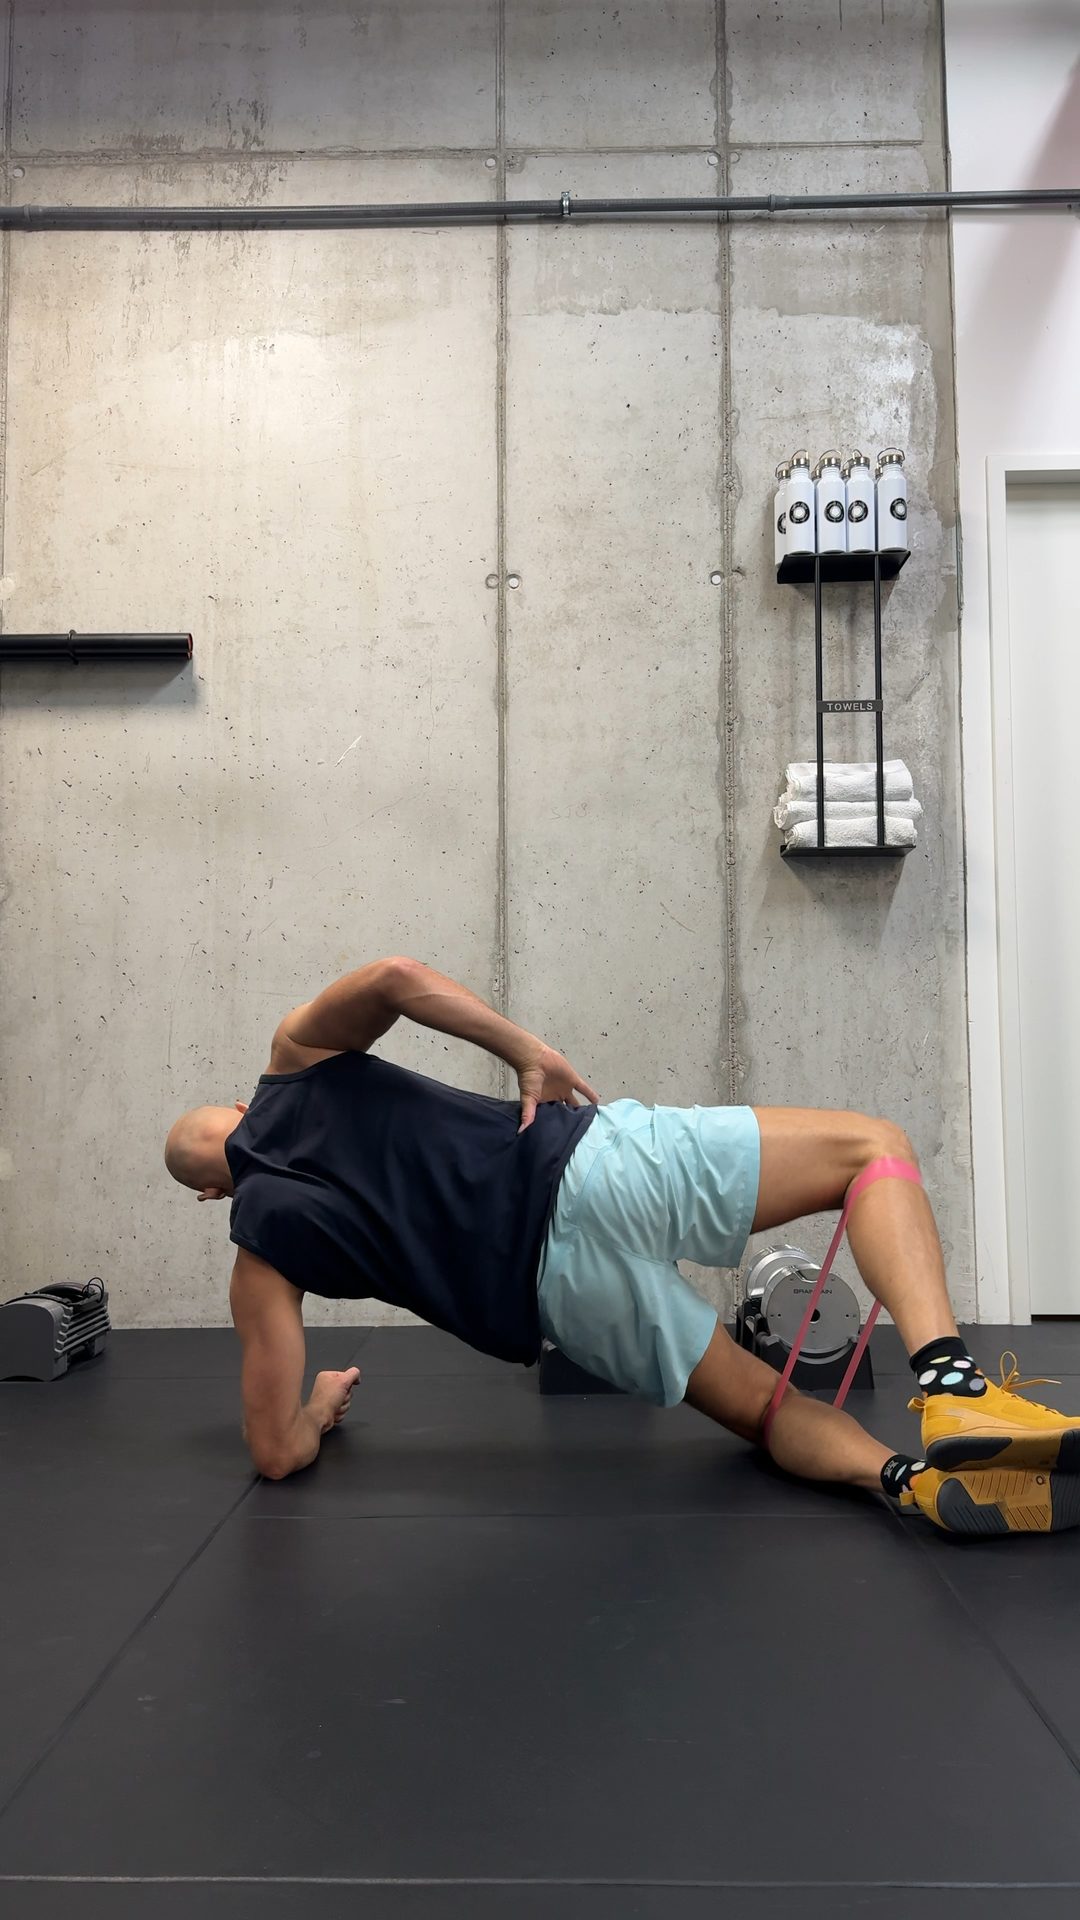
Among common rehab exercises, side-lying abduction produces the highest gluteus medius activation, while single-leg squats and single-leg deadlifts hit both glute regions strongly. A useful map for choosing exercises.
Distefano LJ, et al. (2009). Gluteal muscle activation during common therapeutic exercises. J Orthop Sports Phys Ther 39(7):532–540. DOI: 10.2519/jospt.2009.2796 · EMG study.
Lateral band walk
Block B · gluteus medius enduranceMini-band around the legs, in a slight squat take side steps for higher reps. Why: the gluteus medius is an endurance stabilizer — on long walks or rides it fatigues first, and then the pelvis drops. That's the endurance you're training here.
Cue: toes pointing forward, pelvis still and level, steady band tension — don't let the knees fall inward.
Daily mini glute activation
Block B · the habitThis is the unsexy part that works. A short single-leg glute activation, around 30 seconds per side, repeated once or twice through the day — not a big session, more like brushing your teeth for your hip. Why: frequent, low-key activation keeps the pattern available. For me it was one of the real drivers of the turnaround — it takes minutes and makes it much harder to slide back into the old compensation.
Cue: tie it to something you already do — brushing teeth, waiting for the kettle, standing at the desk: knee up, glute firm, pelvis level. Small and often beats big and rare.
Block C — Lengthening the front actively
Lengthen the hip flexor actively
Block C · length with controlHalf-kneeling or in a split-squat position, bring the back leg into extension and gently tuck the pelvis — the length should come from the pelvic position, not from arching the lower back. Short, gentle, active. Why: you lengthen the front of the hip while the glute learns to hold the position. That's different from just hanging passively into a stretch.
Cue: no aggressive static stretching here, and no hard foam-rolling into the hip flexor. If the area is already protective, fighting it usually adds more tone. Gentle, active, and within a range you can control.
That "lengthen actively" is more than a compromise: strength training through a full range of motion improves flexibility on par with pure stretching — while building strength at the same time. Range and strength come together.
Afonso J, et al. (2021). Healthcare 9(4):427. DOI: 10.3390/healthcare9040427 · Alizadeh S, et al. (2023). Resistance training induces improvements in range of motion. Sports Med 53:707–722. DOI: 10.1007/s40279-022-01804-x · Meta-analyses.
The thread of Part 2: wake up the glutes — hold first, then move, then load, from the glute bridge to the hip thrust. Train the side stabilizer. Lengthen the front actively. That's how you build range you can actually control. Part 3 takes that control under load: hinge, single leg, rotation.
Part 2 — Activate and lengthen (this piece): recruit the glutes from static to hip thrust, lengthen the front actively.
Part 3 — Hinge and single leg: the hip hinge under load, single-leg and lateral work, rotation — and how to put it all together over the weeks (coming).
- Why Your Hips Feel Stuck (Lesson 36) — the pattern and self-check this part builds on.
- Centre and Open (Lesson 31) — the same principle at the shoulder: activate first, then open.
- Strength Training — the base that carries everything (Lesson 13) — why progressive load is the core of every adaptation.
Shown right isn't the same as done right
With glute activation especially, one detail makes almost all the difference: do you actually feel the glute — or is the lower back doing the work again? I can demonstrate the movement clearly and explain it well, and it still may not click in your body right away. That's normal — and it's exactly where real-time coaching helps.
A screen can show you the exercise. A coach can see what your body is doing with it. In a world where almost everything runs through a screen, that's my deliberate counterpoint: workshop and personal training are often the most direct and human way to actually get this into your body.
To the workshopPart 3 is coming — the newsletter brings it to you, along with new exercises from practice.
Sources
Progression & isometrics
Oranchuk DJ, et al. (2019). Scand J Med Sci Sports 29(4):484–503. DOI: 10.1111/sms.13375 — isometrics at long muscle length: more hypertrophy and broader transfer.
Noorkõiv M, et al. (2015). J Sports Sci 33(18):1952–1961. DOI: 10.1080/02640414.2015.1020843 — isometric strength gains are joint-angle specific.
Glute activation & mobility
Contreras B, et al. (2015). J Appl Biomech 31(6):452–458. DOI: 10.1123/jab.2014-0301 — hip thrust: high gluteus maximus activation (EMG; activation isn't automatically more muscle).
Distefano LJ, et al. (2009). J Orthop Sports Phys Ther 39(7):532–540. DOI: 10.2519/jospt.2009.2796 — gluteus medius highest in side-lying abduction.
Afonso J, et al. (2021). Healthcare 9(4):427. DOI: 10.3390/healthcare9040427 · Alizadeh S, et al. (2023). Sports Med 53:707–722. DOI: 10.1007/s40279-022-01804-x — strength through a full range improves flexibility.
The static → dynamic → loaded sequence is a well-established rehab progression principle, not a "best way" proven by a single study. Choosing exercises by EMG activation is a selection pointer, not proof of muscle growth. For persistent or severe pain, see a doctor.